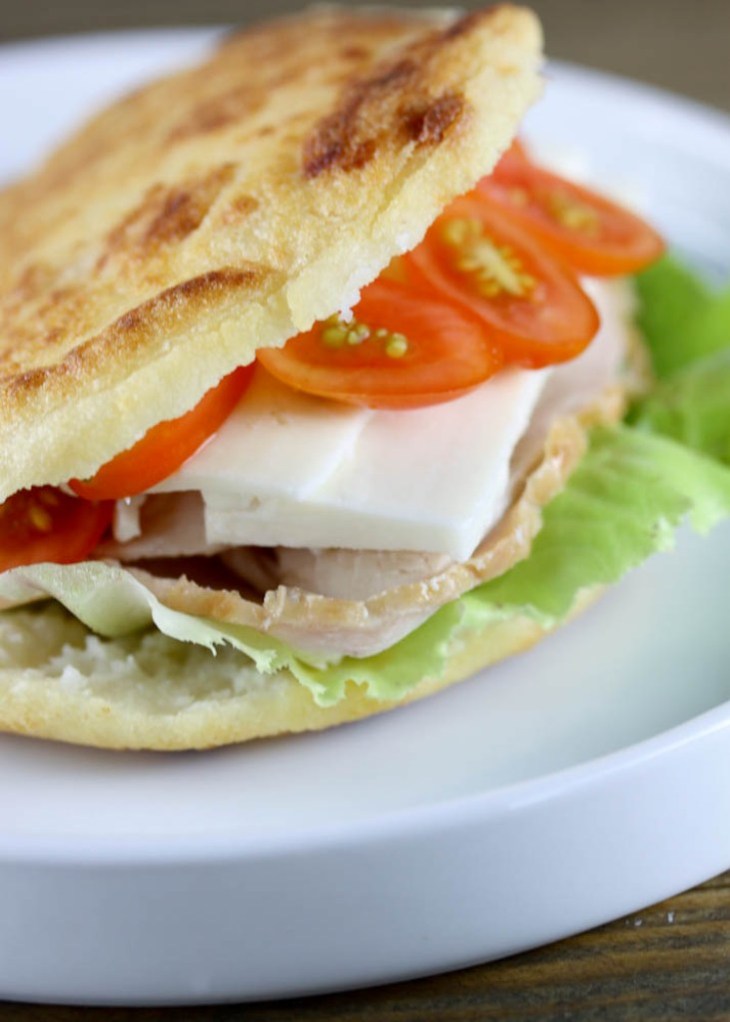
Have you ever tried an arepa? They are a staple of Salvadorean, Colombian, and Venezuelan cuisine. In El Salvador, they are called pupusas and are stuffed with cheese, chicharron (pork belly), beans, and served with a cabbage relish. In Colombia, they are served with cheese, and in the traditional dish Bandeja Paisa. In Venezuela, they are opened and stuffed with carne mechada (shredded skirt steak).
In Panama, you can find them at any supermarket. I would typically have them for breakfast with some queso fresco and ham. Nowadays, I like to stuff them with queso fresco, roasted turkey, lettuce and tomatoes for dinner. They are truly versatile and pretty healthy. The ingredients consist of special arepa cornmeal, water, and salt. I can’t find pre-made arepas at grocery stores in DC, and I’ve been trying to make the perfect arepa for a long long time.
After a lot of experimenting, I came up with a recipe that replicates the things I like the most about an arepa: great flavor and a good crust. I also wanted an arepa that can be cut open to fill, like Venezuelan arepas. Getting the arepas to develop a pocket is not easy. My recipe has milk, baking powder, melted butter, and crumbled cheese. The additions make for a really good crust and a richer flavor. The milk, butter and cheese help in getting great flavor and color. The baking powder helps in developing a pocket.
If you want to make a healthier version, you can omit the butter and cheese, and you can replace the milk with water. You can also omit the baking powder. I make them both ways, plain without butter/cheese/milk/baking powder, or the enriched version. I much prefer the version with the additions.
Arepas are sometimes fried. I prefer to brown them on a skillet and then finish cooking them in the oven. While they cook in the oven, they will puff up and develop the pocket. For the last 5 minutes they are then transferred from the cookie sheet directly to the oven rack. This produces a really good crust.
Arepas
(makes about 8 arepas)
2 cups white corn masarepa
1 teaspoon salt
2 teaspoons baking powder
2 cups warm water
1 cup warm milk
1 tablespoon melted butter
2 tablespoons queso fresco, finely crumbled (or a feta)
Cooking spray, for spraying arepas (you could also brush them with a bit of canola oil)
1. Pre-heat oven to 350°F. Line a cookie sheet with aluminum foil and spray lightly with cooking spray.
2. Mix masarepa, salt, and baking powder in a bowl. Mix milk, water, and melted butter and pour over the masarepa mixture. Mix well with a fork. Let rest for 5 minutes. Mix in the crumbled cheese. Knead the mixture in the bowl for 5 minutes.
3. Pre-heat a non-stick skillet (or a well seasoned cast iron griddle), or on medium heat.
4. Form arepas in the desired size with wet hands. I use about ½ cup of mixture per arepa. Mixture should not be too wet. If the mixture cracks when you are trying to form the arepas, the mixture is too dry and needs a bit more water. Make one arepa at a time, with wet hands, forming it with the palm of your hands. No finger marks here! Spray the side that you will put down on the skillet with cooking spray.
5. Grill on the skillet for about 5 minutes on the first side. You want the arepa to develop a crust on this side before you turn it, so just put it down and don’t touch it for a few minutes. Spray the other side with cooking spray before flipping over. Grill until both sides have light golden brown marks. If you see the skillet starting to smoke, the heat is too high, turn it down and make sure you don’t burn the arepas. Remember that they will brown more in the oven.
6. Transfer the arepas to the prepared cookie sheet and bake for 15-25 minutes. After 15-25 minutes, they will puff up a bit in the middle and will turn golden brown. Remove them from the cookie sheet and place them right on the oven rack for an additional 5 minutes. This is optional, but I find that I get a better crust when I do this. A good crust is important if you are going to fill them like sandwiches. If you are not going to fill them, you can skip this step.
7. If not serving right away, let them cool and then store them in a zip top bag and refrigerate. You can warm them up in the microwave or a toaster oven.


They are really tasty! But in Mexico we make them different and they are called “gorditas de nata” they are very similar, but tastier and maybe you should try them!
http://bitstreats.blogspot.com/
caracas arepas! arepas caracas!
Betty–I had never heard of gorditas de nata! WIll look them up!
Annie–Caracas arepas are the best arepas ever! I want some!!!
Annie–And btw, Caracas arepas inspired this post. I was determined to get pockets so I could stuff them!
These sound amazing, I am a huge fan of any sort of bread! And perfect for lunches & dinners….though goodness knows where I would find white corn masarepa in Auckland 🙂 I make do with little pita pockets 🙂
This looks amazing and I am making them right now but I am confused where the cheese and butter go I have read the recipe 3x and just can’t find it.
Hi Dawn! Thanks for pointing that out, I just corrected the recipe.
Hehe I made it anyway left out the butter and added the cheese when I added the milk and water they were so good! I will be making these again very very soon I wonder how they would be with scrambled eggs and chorizo.. anyway THANK YOU!